Bridge your funds with Etherscan
Bridging your funds via etherscan is not the recommended method. Please use the token bridge instead.
Set up
Before you begin, ensure your wallet is:
Bridge ETH from Goerli to Linea
- Go to the Linea Message Service transparent proxy contract on Goerli Etherscan
- Navigate to Contract > Write as Proxy tab
- Connect your wallet by clicking on the “Connect with web3” button
- Open the
SendMessagefunction form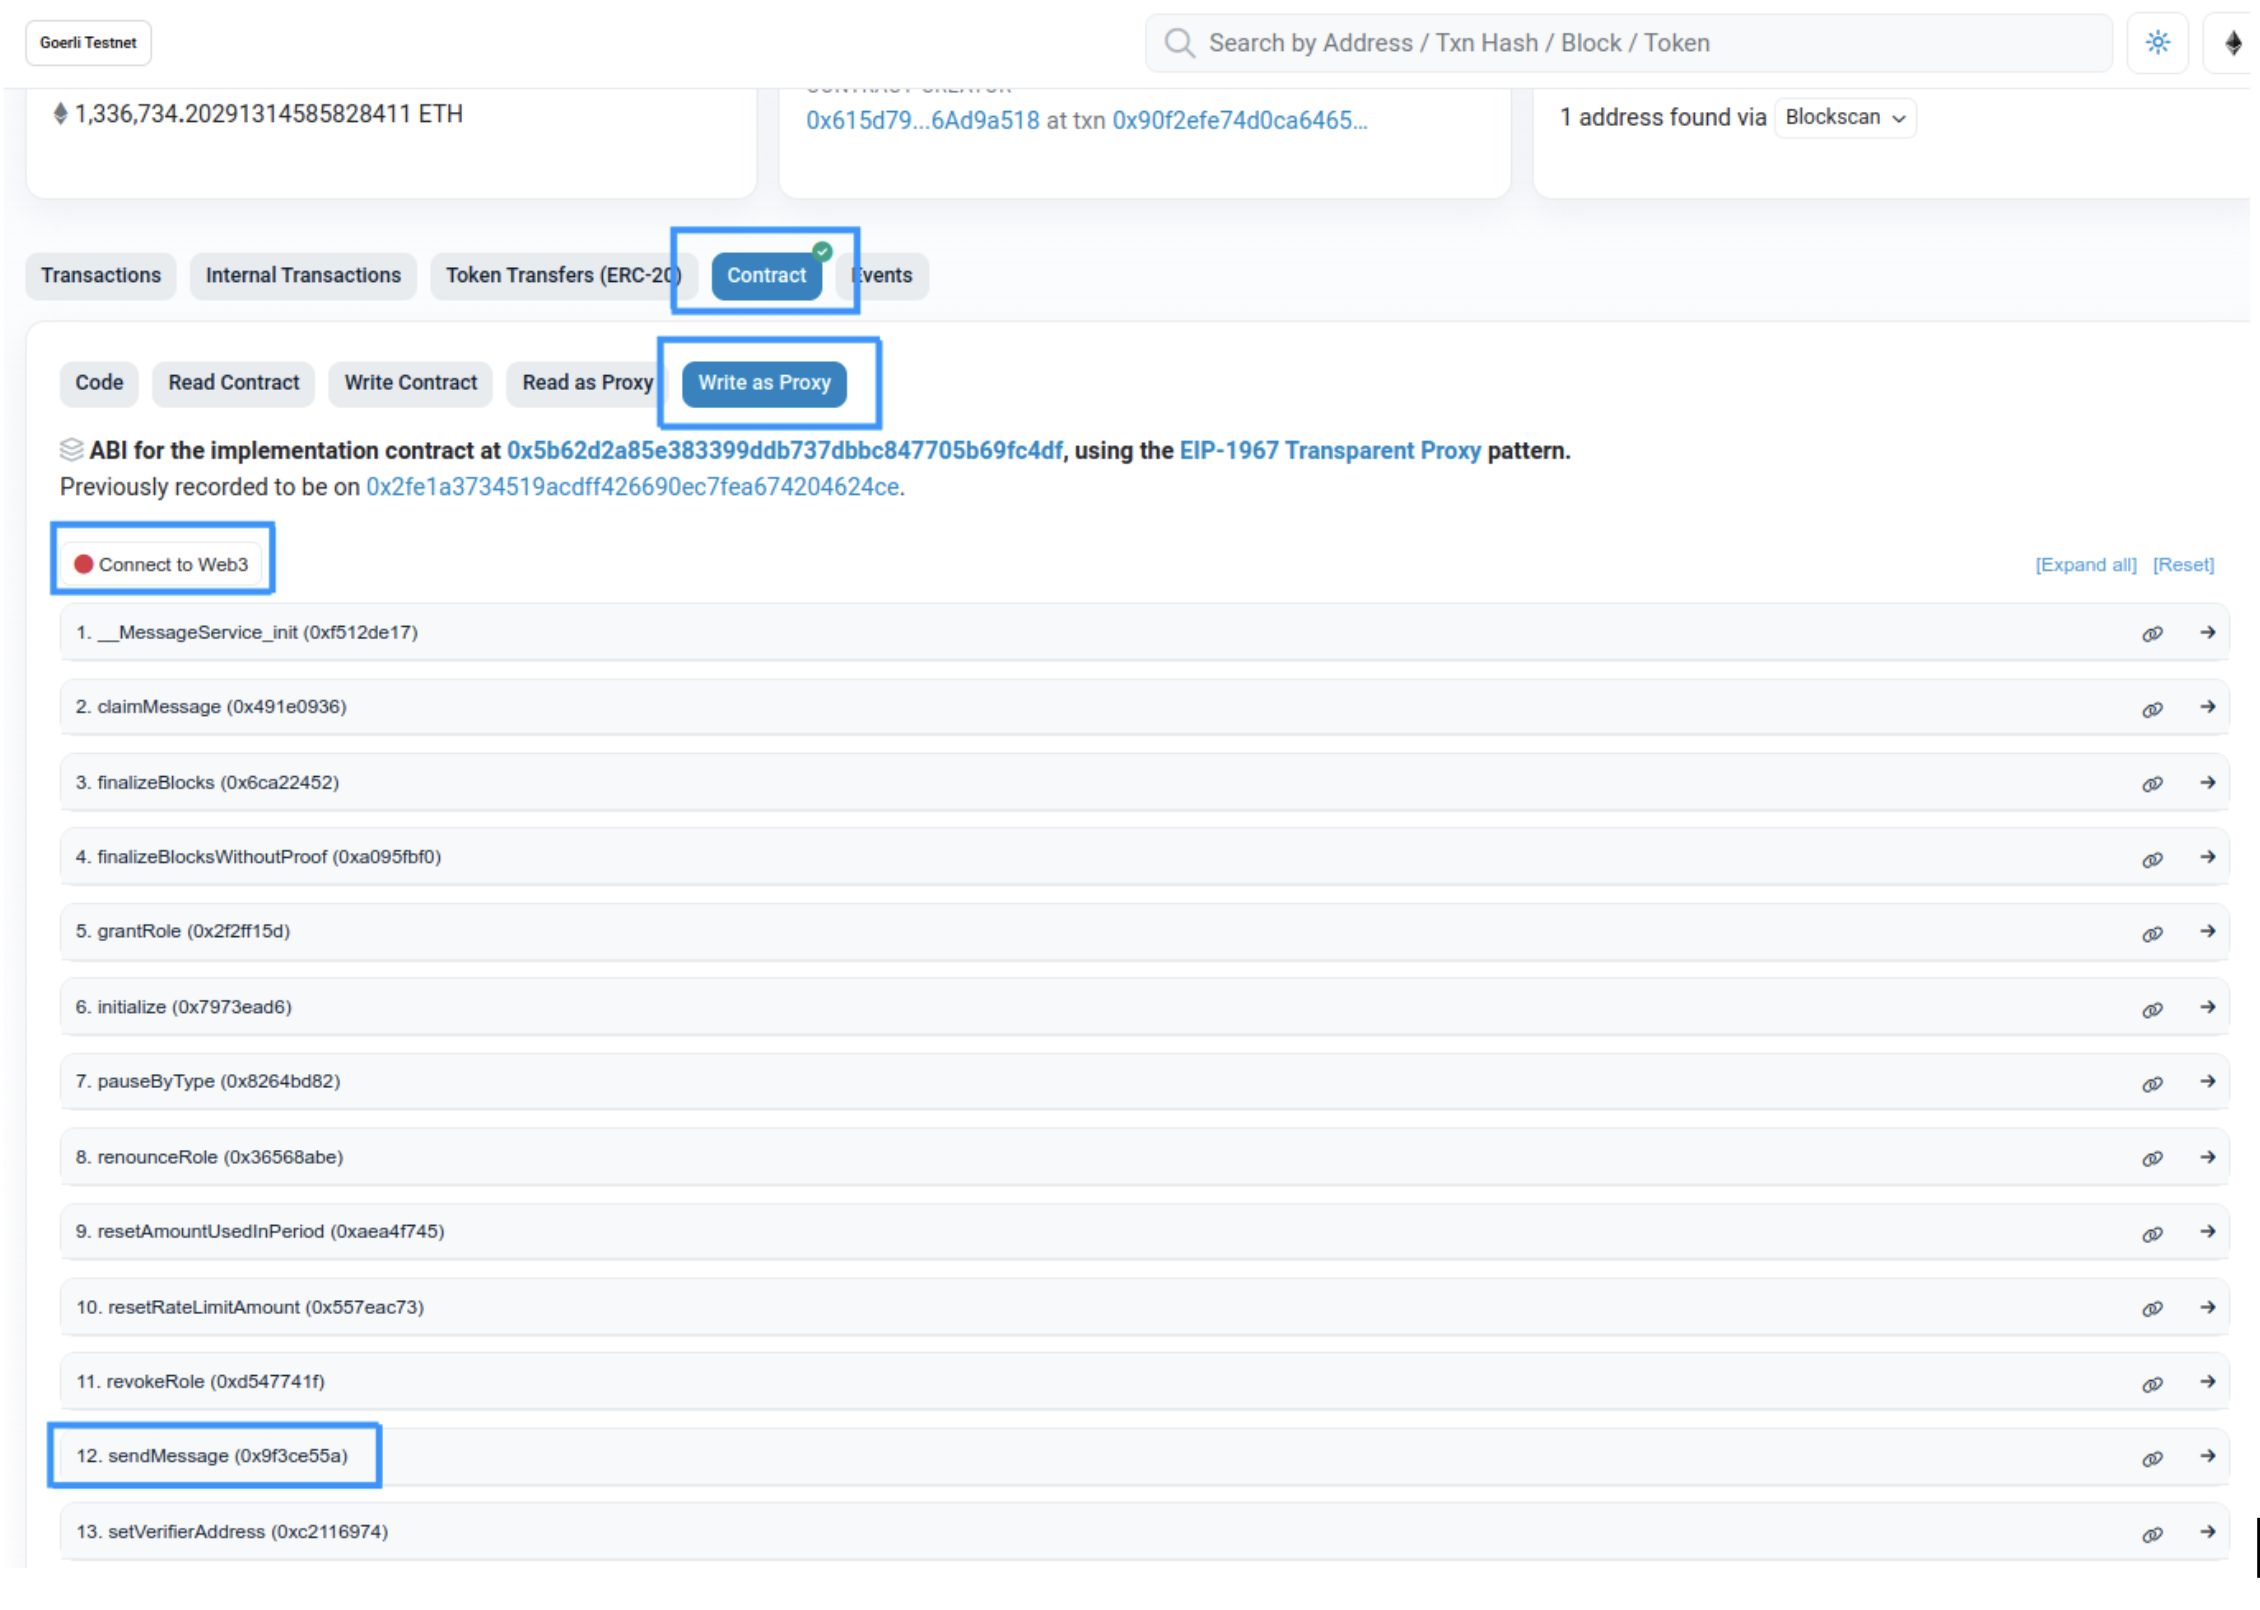
- Complete the form with the following information:
sendMessage This is the amount of ETH to send _to This is the recipient on the other layer (usually your Ethereum address) _fee This is the fee paid to the postman to execute the transfer on the second layer automatically. Users will eventually receive payableAmount. We recommend providing a 0.001 ETH fee to ensure proper execution. Note: the amount is in wei, so 0.001 ETH = 10e15 or 1000000000000000 _calldata For simple transfer, send empty calldata with 0x. - Validate the transaction on your wallet and you’re done 🎉! Your funds should arrive on the other layer under a few minutes (L2 -> L1 bridging is a bit longer and can take up to ~15min).
Bridge ETH from Linea to Goerli
Follow the steps above, but use the Linea Message Service transparent proxy contract on Linea Etherscan instead!
Bridge ERC20 from Goerli to Linea
- Go to the ERC20 contract of your choice on Etherscan docs
- Navigate to Contract > Write Contract tab
- Connect your wallet by clicking on the “Connect with web3” button
- Open the
approvefunction form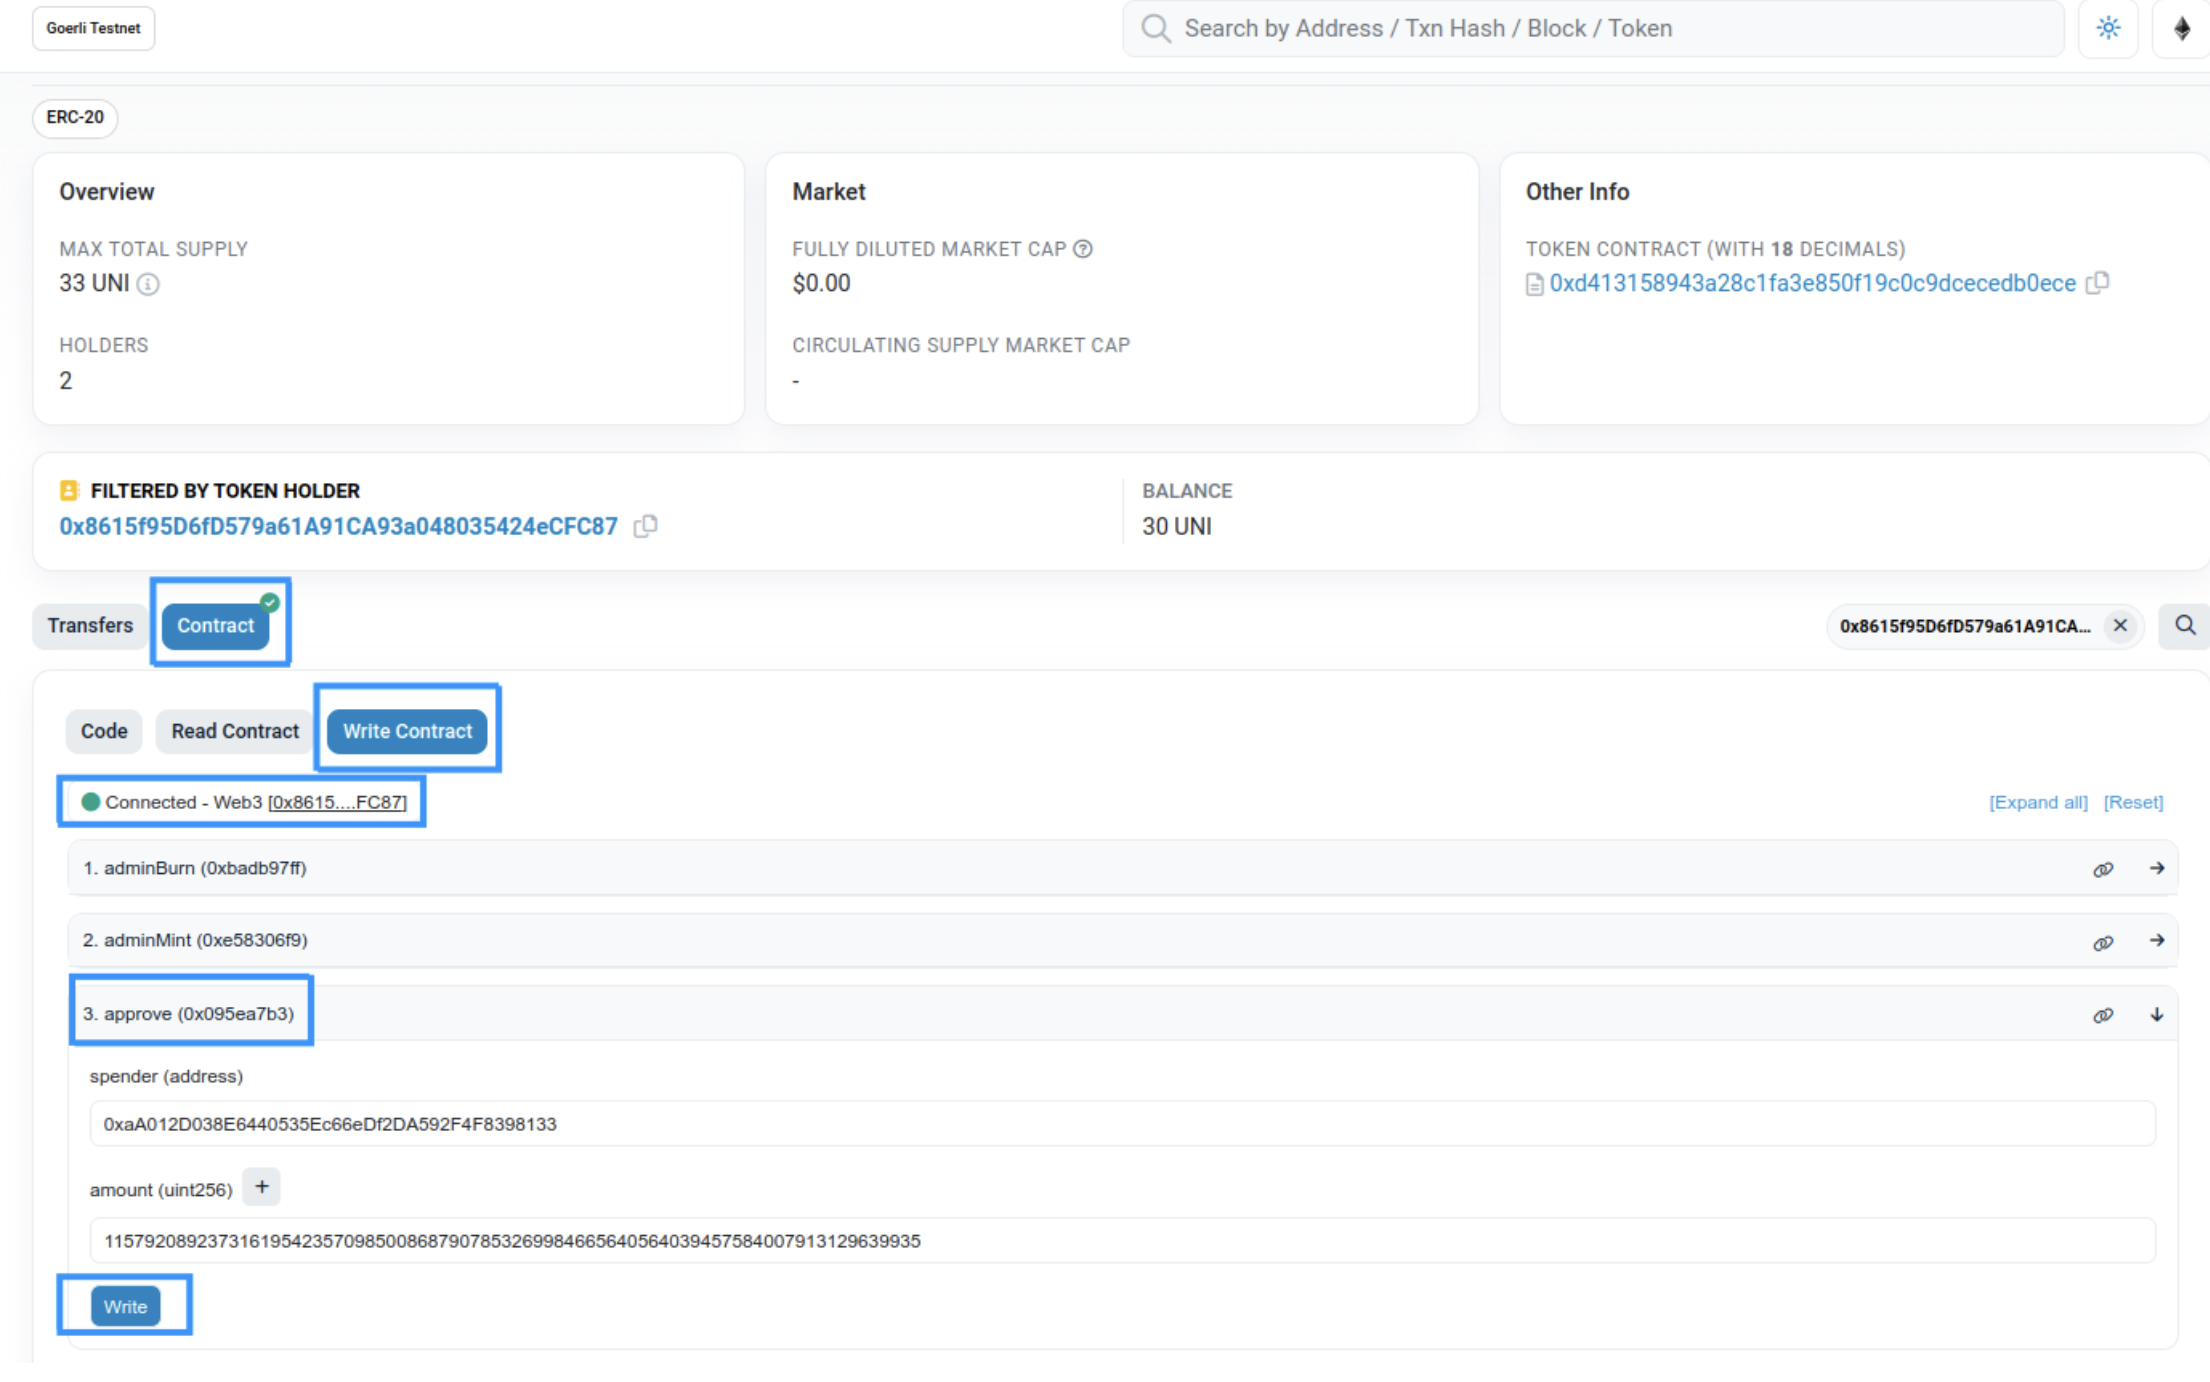
- Complete the form with the following information:
spender Fill it with the Token Bridge transparent proxy address as spender. For Goerli, use 0xaA012D038E6440535Ec66eDf2DA592F4F8398133. amount This is the amount you want to send. Note: the amount is in the lowest decimal. To send 1 $UNI which has 18 decimals, you need to input 1000000000000000000 - Go to the Linea ERC20 Token Bridge transparent proxy contract on Etherscan.
- Navigate to Contract > Write as Proxy tab
- Connect your wallet by clicking on the “Connect with web3” button
- Open the
BridgeTokenfunction form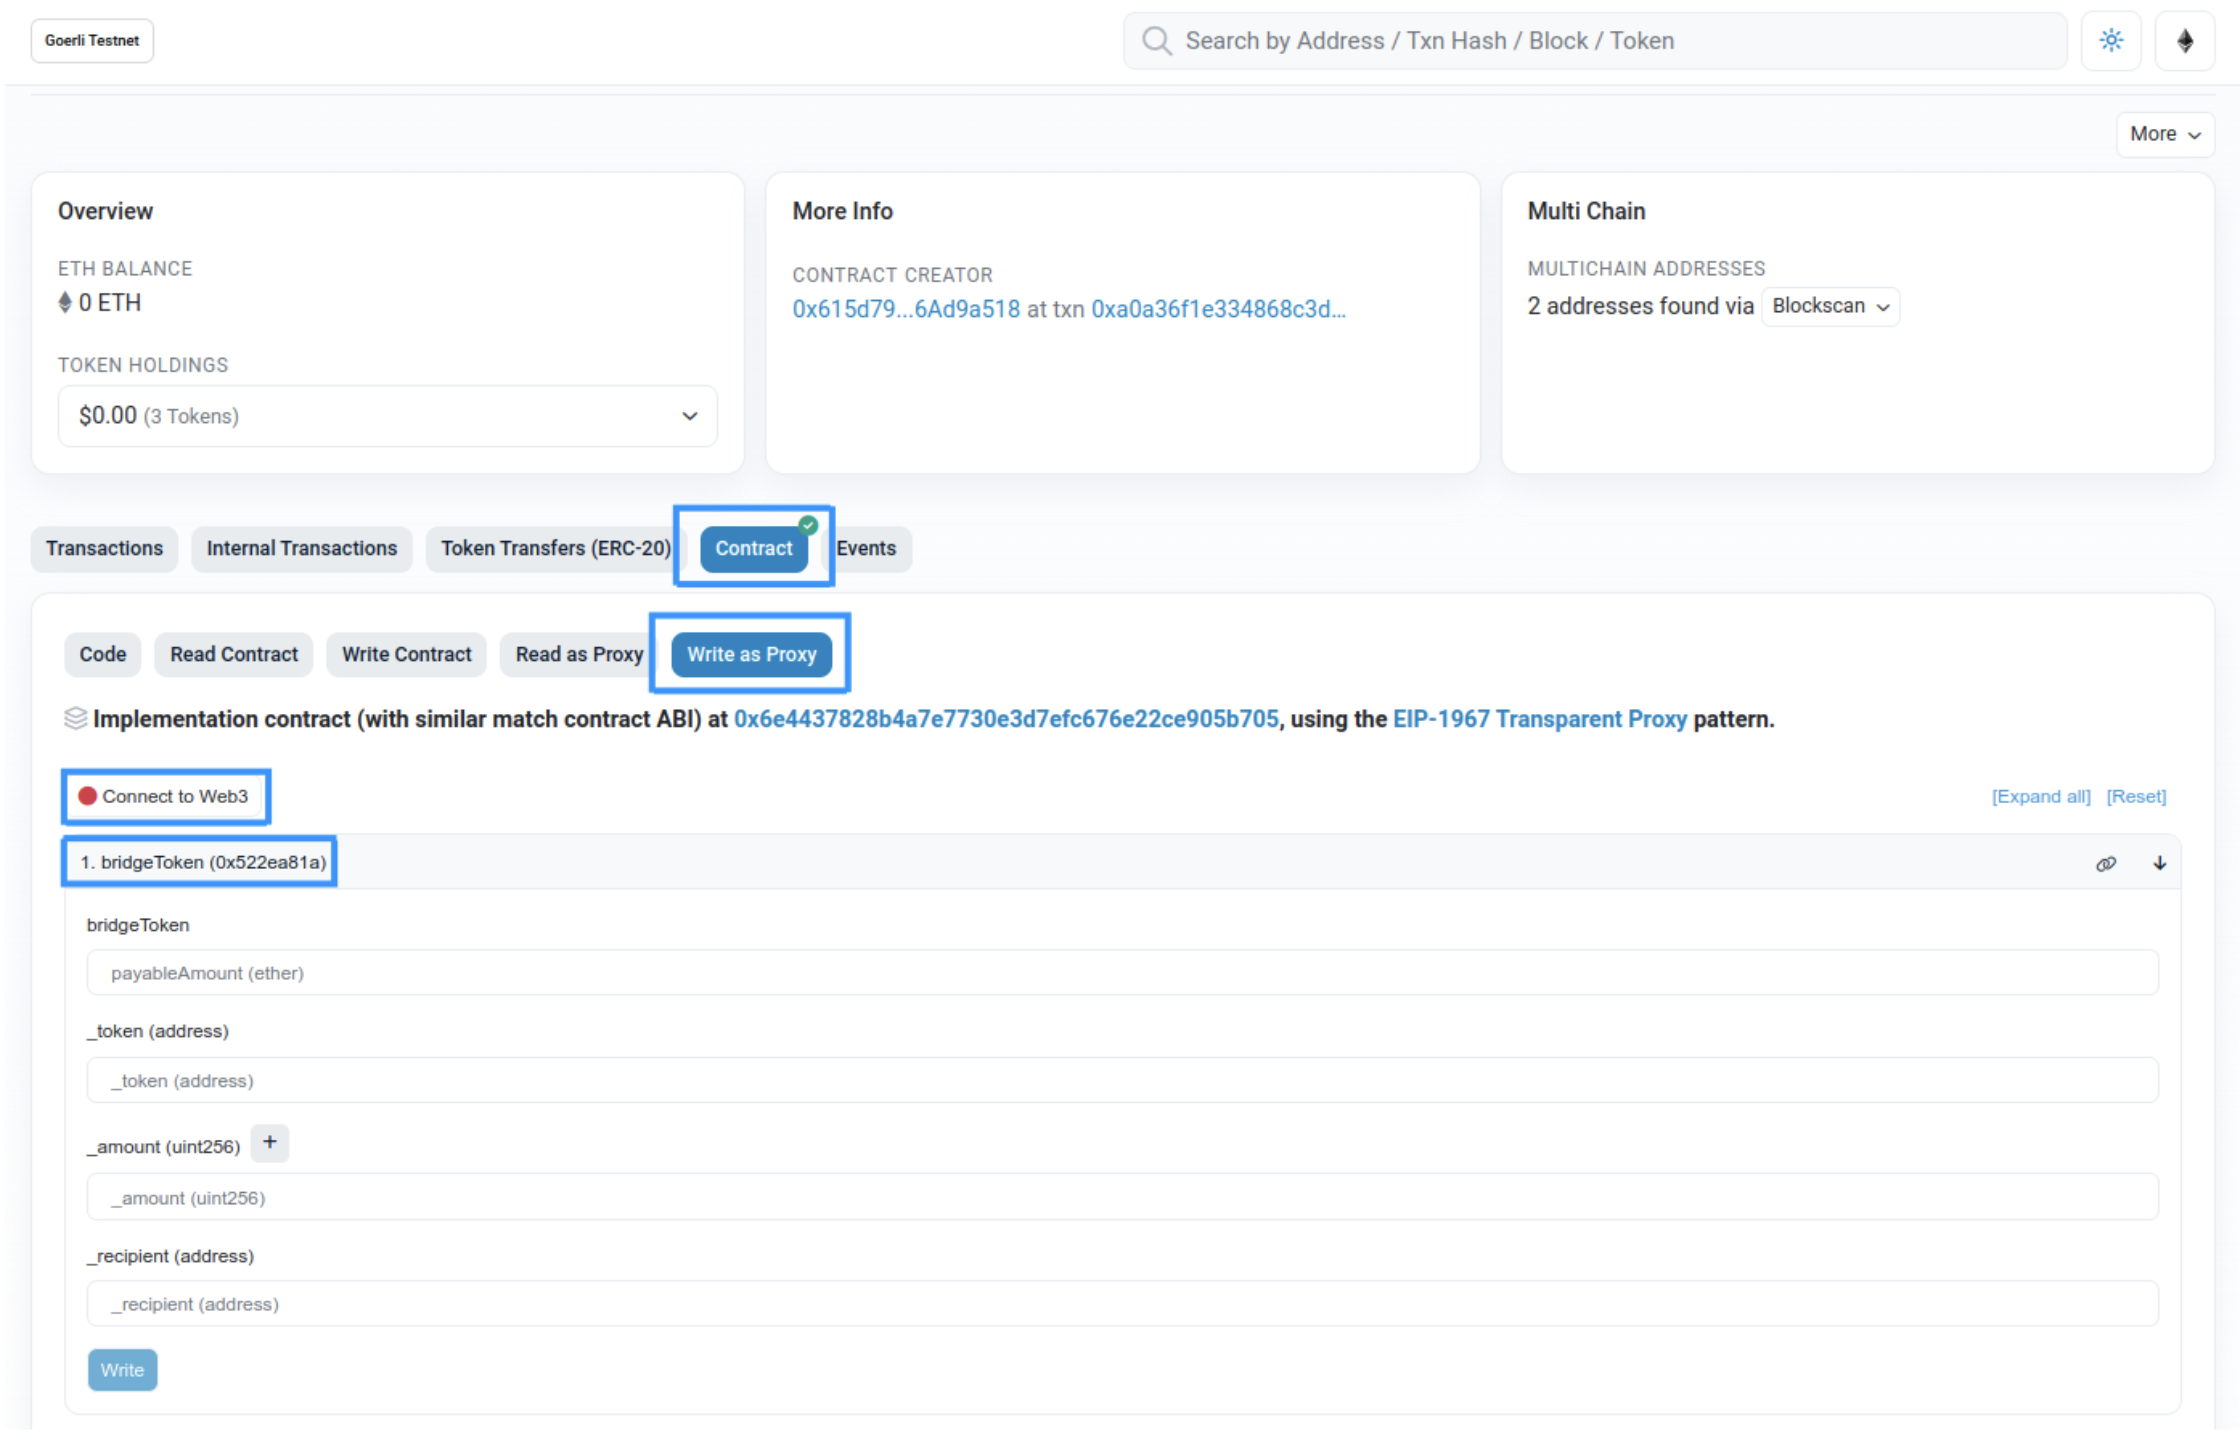
- Complete it with the following information:
BridgeToken (payableAmount) This is the fee paid to the postman message service to execute the transfer on the second layer automatically. Users will eventually receive _fee. We recommend providing a 0.001 ETH fee to ensure proper execution. Note: the amount is in wei, so 0.001 ETH = 1000000000000000. _token This is the address of the ERC20 to bridge _amount Note: the amount is in the lowest decimal. To send 1 $UNI which has 18 decimals, you need to input 1000000000000000000 _recipient This is the recipient address on the other layer - Validate the transaction on your wallet and you’re done 🎉! Your funds should arrive on the other layer under a few minutes (L2 -> L1 bridging is a bit longer and can take up to ~15min)
Bridge ERC20 from Linea to Goerli
Follow the same steps as above, except use the Token Bridge transparent proxy address (0xB191E3d98074f92584E5205B99c3F17fB2068927) as spender on Linea, and use the Goerli ERC20 Token Bridge transparent proxy contract to bridge the token.
Manually complete a bridge transaction
This step is not mandatory unless you didn’t send enough fees when initiating your bridge transaction
Browse your
Transaction Detailspage of the transaction you sent on the source layerGo to the
LogstabFind the log for the
MessageSentevent and keep it open for a later step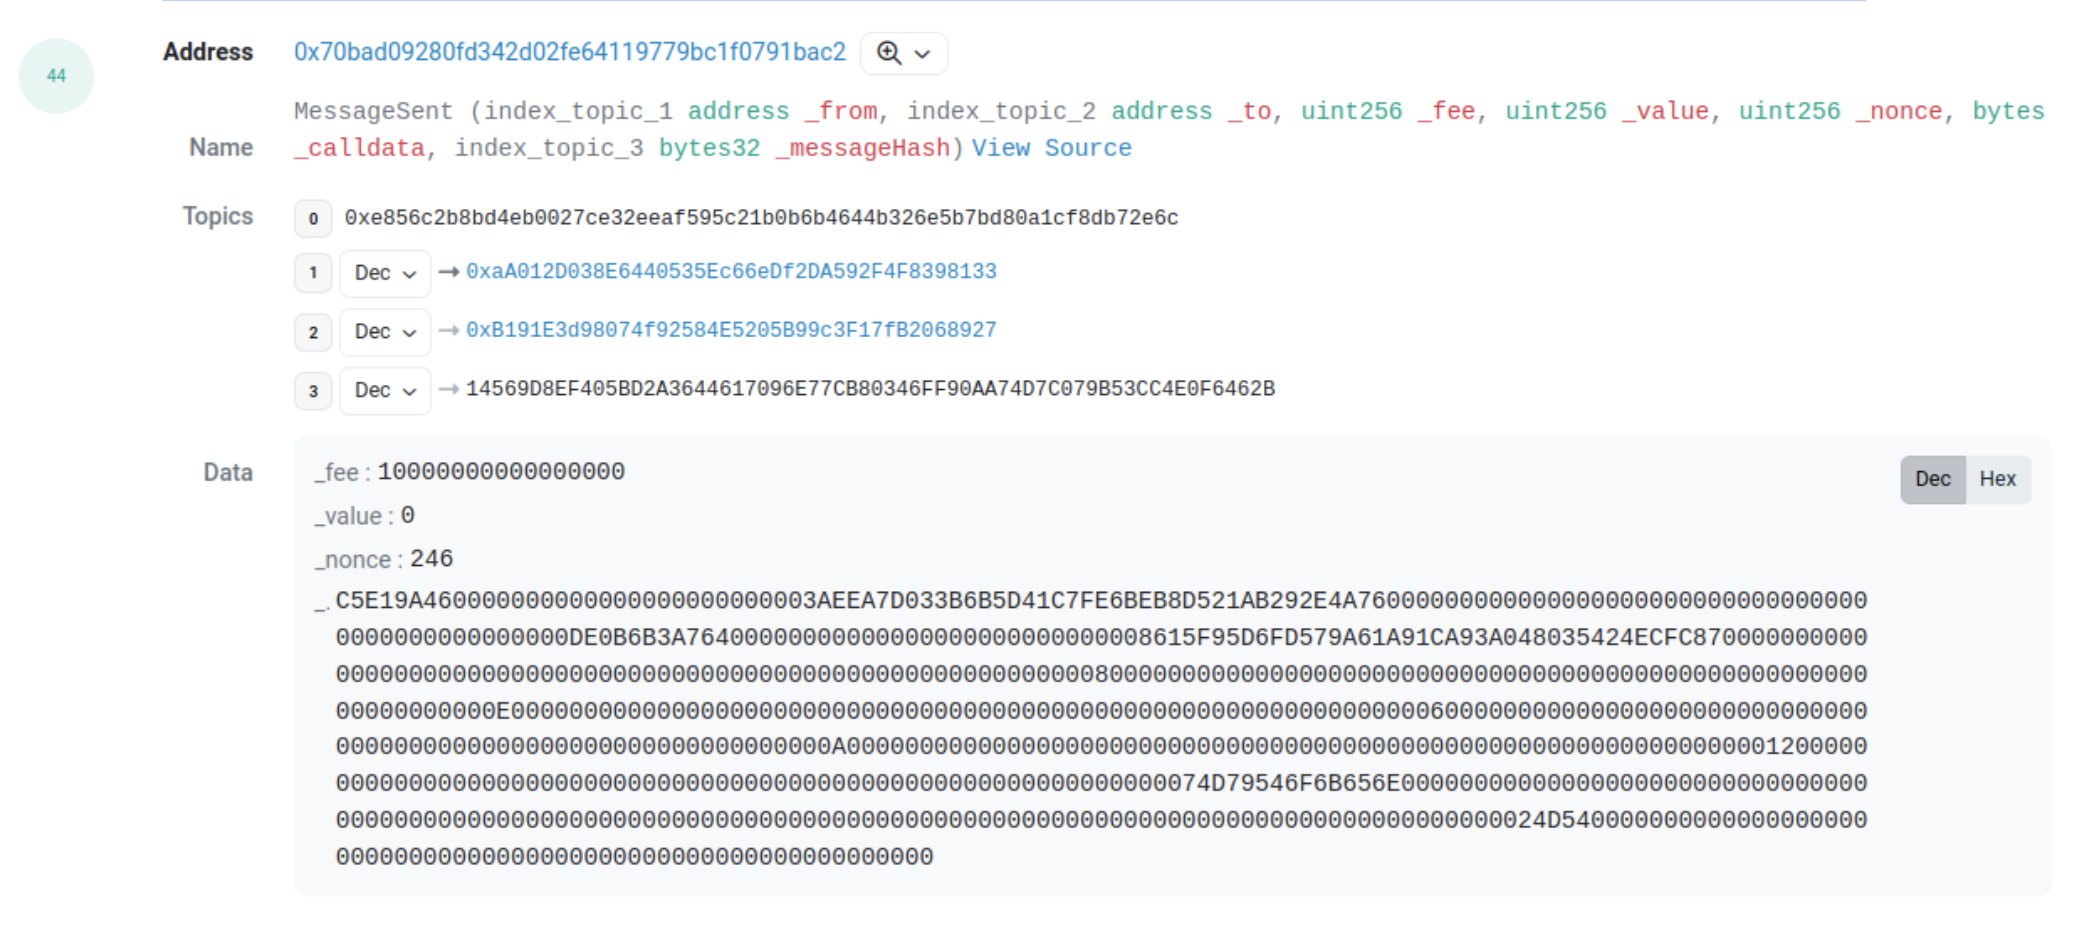
Go to the Message Service contract on the other Layer (0xC499a572640B64eA1C8c194c43Bc3E19940719dC on L2)
Navigate to the
Write Proxytab, connect your wallet, and call theclaimMessagefunction using the parameters found in the logs MessageSent checked earlier. Note:bytesargument need to start with0x0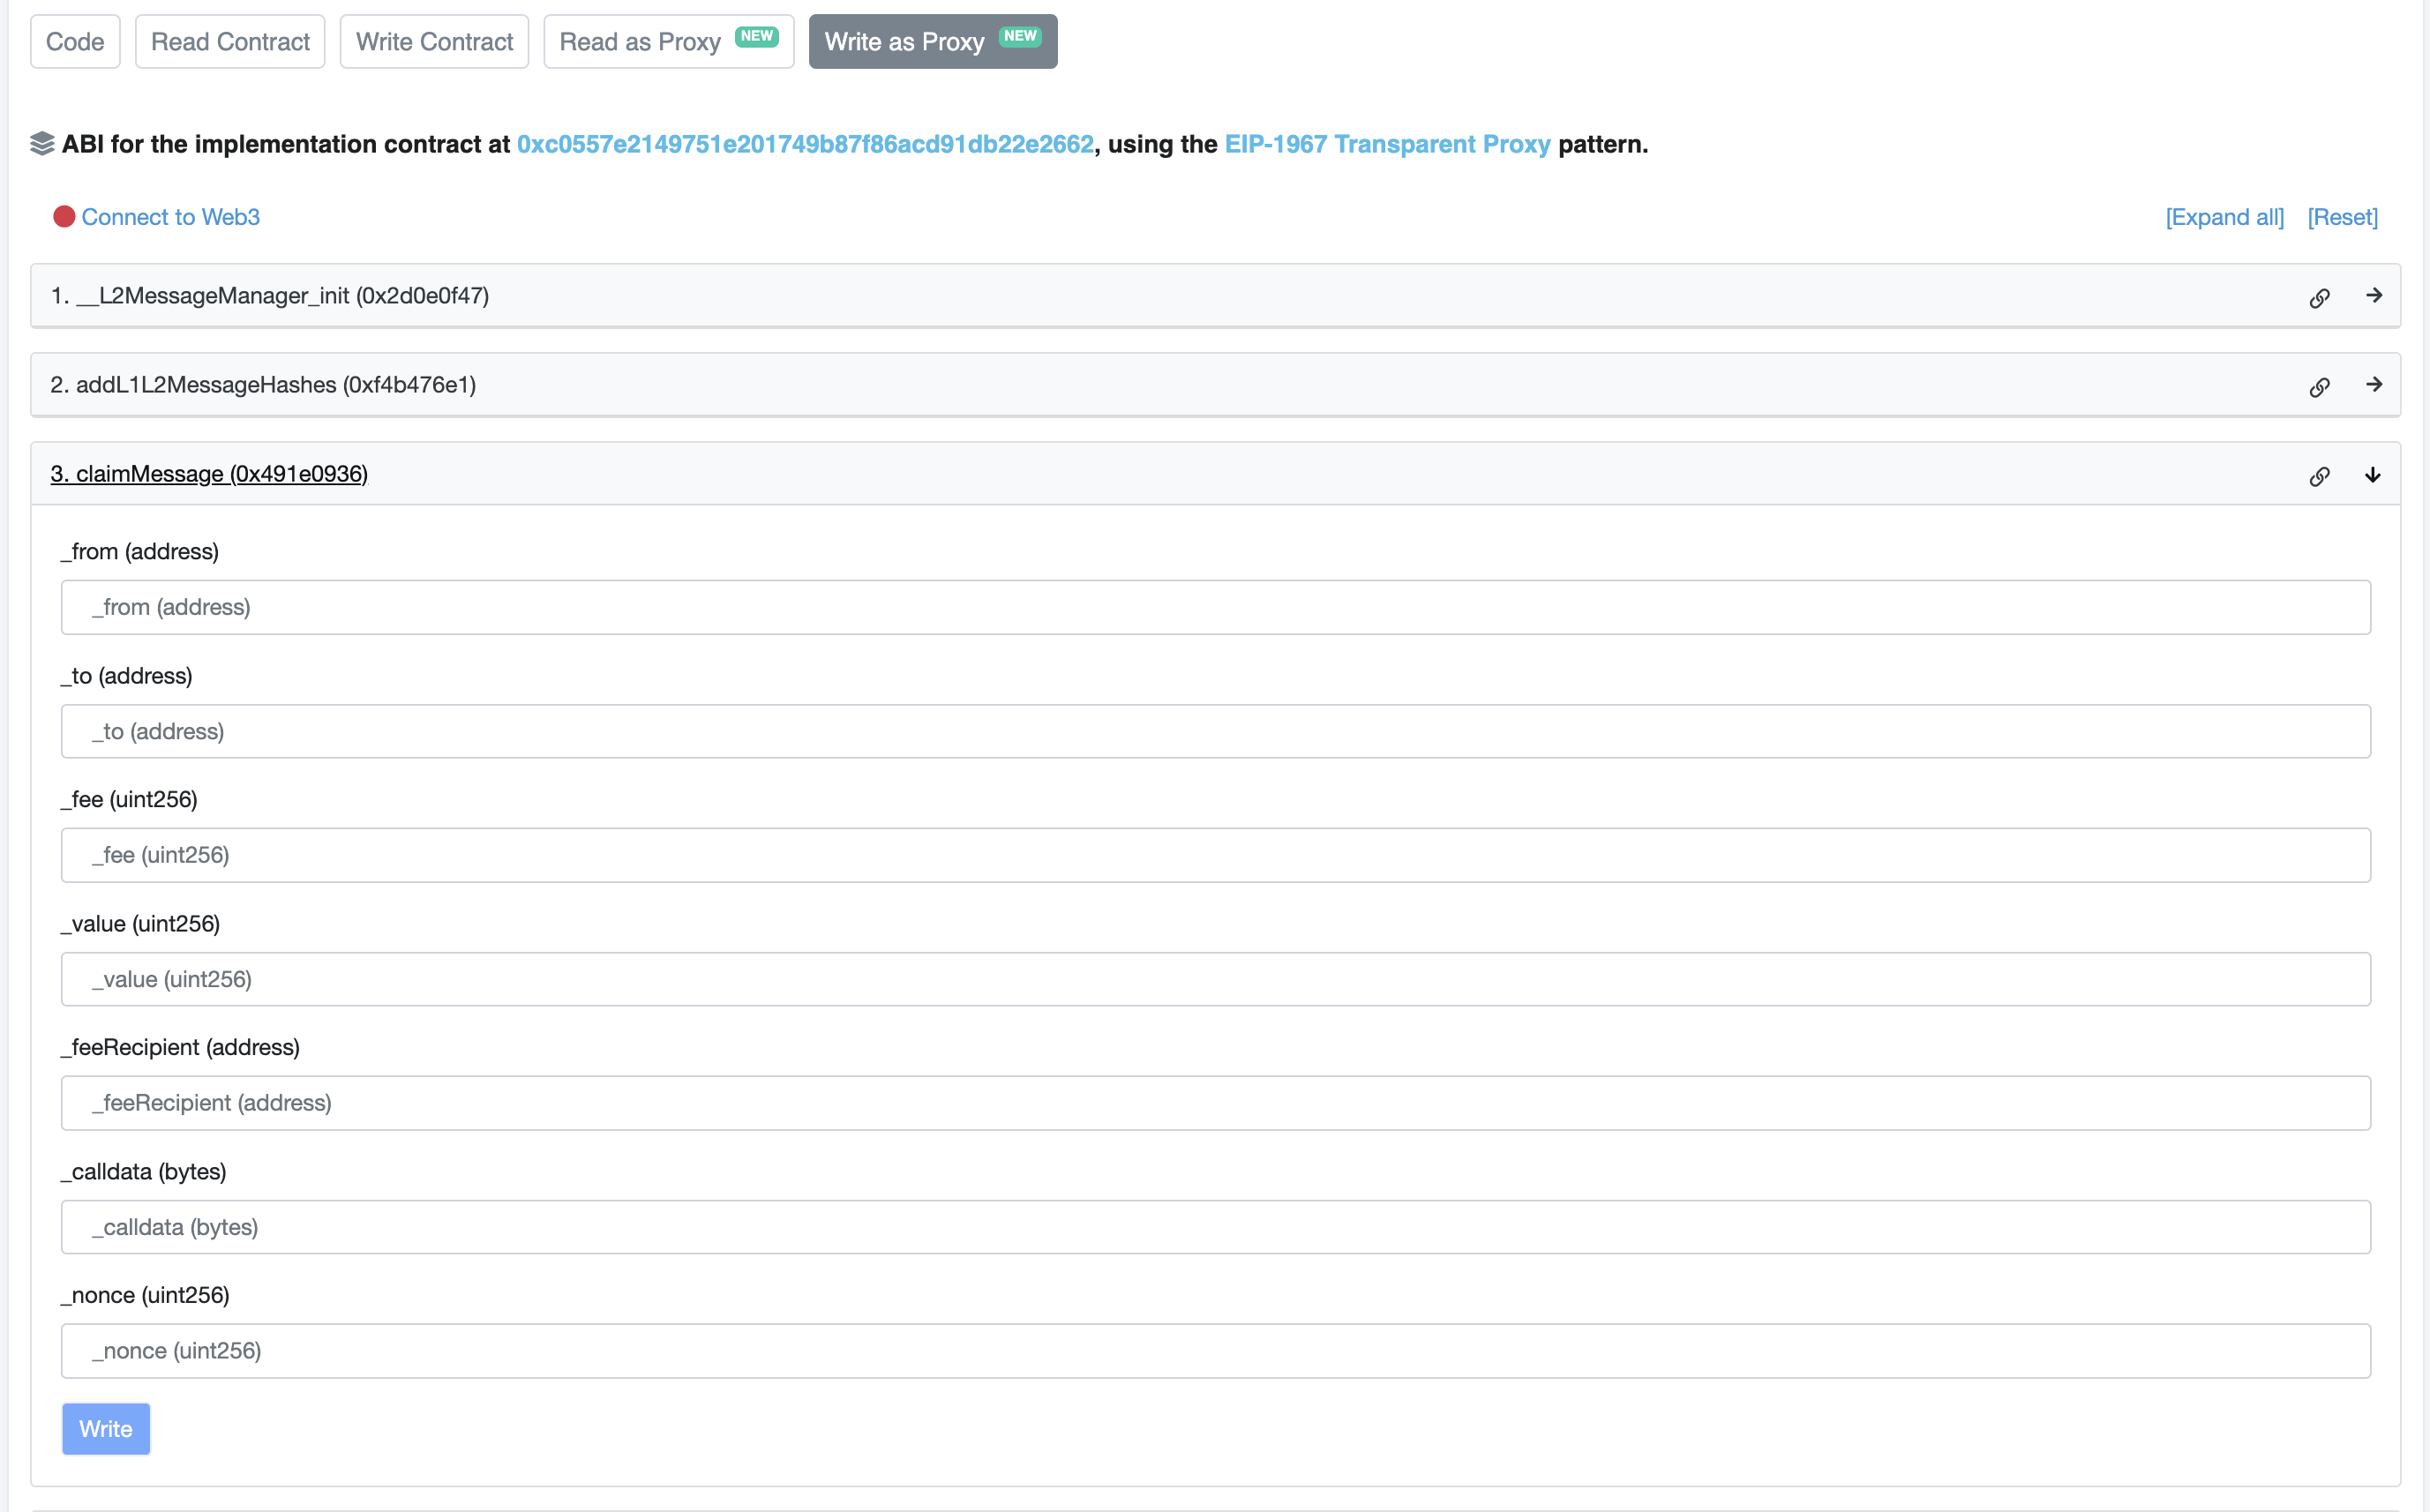
Confirm the transaction on your wallet